4.4 VRS 5 Installation Instructions
4.4.1 Introduction
4.4.2 Uninstall and Reinstall Kofax
4.4.1 Introduction
You have been directed here because you are either:
- installing Kofax and VRS software on a PC while using a Fujitsu 6230Z scanner or,
- you already have this software installed and recently purchased the Fujitsu 6230Z scanner.
If you are not using that specific scanner, click the back button and follow the instructions for all other scanners at section 3.6.3.5.
4.4.2 Uninstall and Reinstall Kofax
If you already have Kofax and VRS 4.5 installed, but recently purchased the Fujitsu 6230Z, you must un-install the previous Kofax installation and clean the system using the Kofax Cleanup Utility.
- See 3.6.3.2 to uninstall all Kofax software
- Run the Kofax Capture Cleanup Utility in 3.6.3.4. This was downloaded as part of the Kofax software download (from 3.6.2.1). Search for it on the C drive of the scanner PC or download it again here. After running the utility, return here. Do not reinstall Kofax with the instructions in section 3.6.3.5.
Install the VRS 5 and Kofax software in the following order:
- Attach the new scanner using the USB connection and power the unit on.
- Install the VRS software from the bundled CD supplied by Fujitsu following the installation prompts. At the appropriate time select your scanner model.
-
The screen shots below document the steps necessary to configure the scan source and license your version of VRS 5.0. When you return to section ‘3.6 Scanner Installation Procedures’ you can skip sections 3.6.11 and 3.6.12 which are accomplishing the same steps for VRS 4.5.
- With VRS 5.0 you have a separate program group. Use the Kofax VRS Administration Console to configure the VRS 5.0 software.
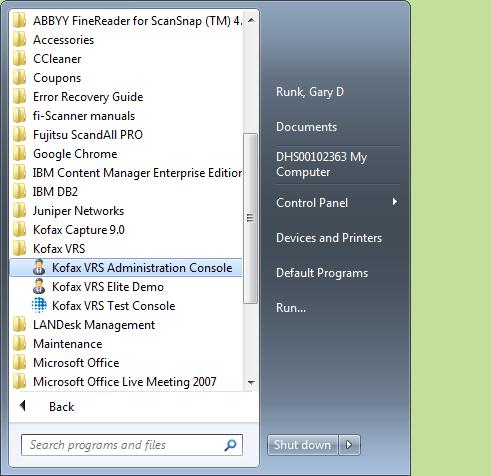
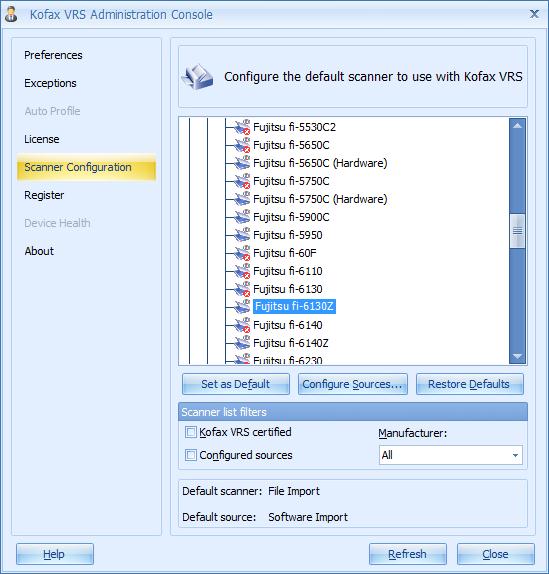
- Begin by selecting the Scanner Configuration option and selecting your scanner model.
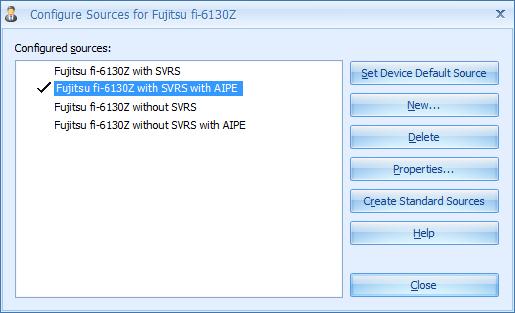
- Then click ‘Configure Sources’ and pick ‘with SVRS with AIPE’ and then click ‘Set Device Default Source’. Then click ‘Close’.
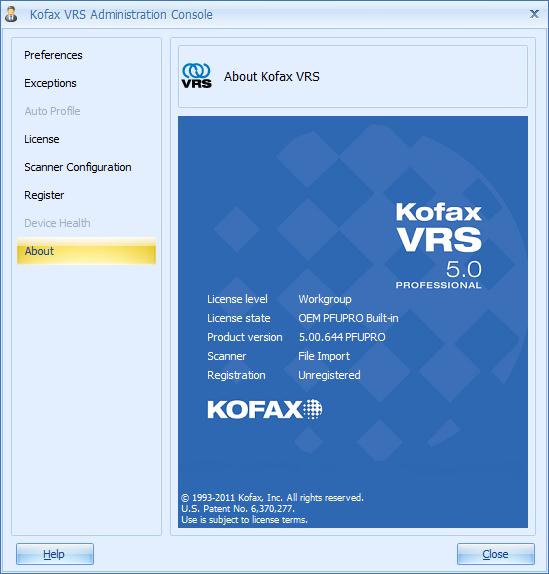
- Select the ‘License Option’. If it DOES NOT state the license is ‘Built-In’ as in the screen shot below then you will need to enter license codes and activate the software license. See the next screen shot following the one below.
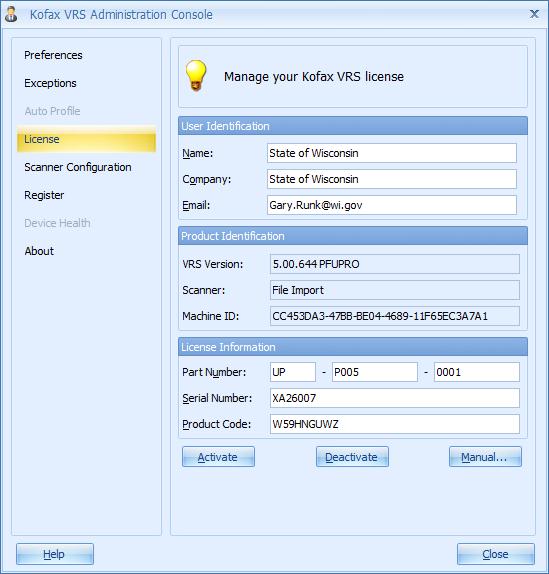
- Enter your license keys supplied with the VRS CD that came bundled with your scanner.
-
Click ‘Activate’, you should then receive a confirming message that your ‘VRS software is now Activated’.
-
Then click ‘OK’ on the confirming message and close the VRS Administration Console.
-
This completes the configuration process of the VRS 5.0 software.
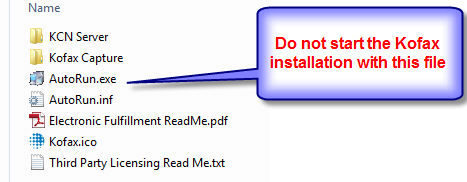
The standard installation files from Kofax automatically install VRS version 4.5. However, that version is not supported by the new Fujitsu scanners. These requires VRS version 5. To work around this, you must not use the autorun.exe installation file from Kofax since it installs VRS 4.5. In section 3.6.2.1 you downloaded Kofax and corresponding files. See the screenshot below.
- Kofax Capture can now be installed using the /NoVRS switch from the Run Command of Windows.
-
Instead of running the ‘autorun.exe’ you will need to execute the ‘setup.exe’ with the ‘NoVRS’ switch. See the examples below for direction on this process.
-
First, shut down all other software except for the browser with this ECF handbook open.
-
This section must be coordinated with DHS staff. Click on the Contact Us link in this handbook to coordinate. You can continue at this point, but in step 3.6.7 of the installation, you will have to wait until you get a license to sync up to the server.
-
Verify the site name for this PC (see 3.9 and return here).
Standalone installation
Most PC's use the "standalone" installation option. However, there are several PC's statewide that use an option called "Dual Workstation" where a second PC can be used to validate documents scanned at another PC that is attached to the scanner. In that situation, the PC with the scanner acts as a server PC with a different installation and the validation PC (Client PC) uses an installation option from files on the server PC.
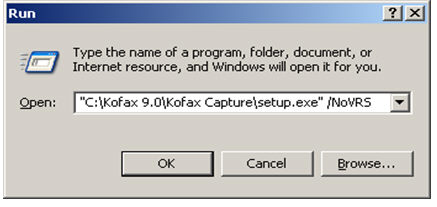
The following screen shot illustrates installing the software for a remote site single machine (standalone choice). Notice you are not executing the Autorun.exe as you would for a normal install. Your path to the file may be different.
- Click Start> Run to start the Windows Run Command
- Find the Kofax 9.0 folder that you downloaded and use the path to the setup.exe file. Be sure to use the quotes if you type in the path. Or just browse to the setup.exe file and select it.
Dual Workstation Server PC
The following screen shot illustrates installing the software from a remote site server machine on to a remote site client machine in a multi station configuration (server choice).
- Find the Capture SV folder that you downloaded and use the path to the setup.exe file.
- Click Start> Run to start the Windows Run Command
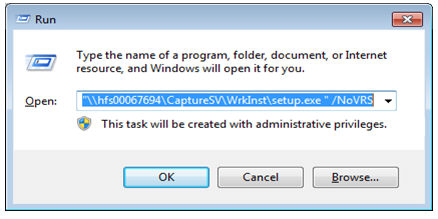
- Add a space after the path to the setup.exe file and add /NoVRS to the end.
- Click OK.
- This begins the installation. Continue at 3.6.3.6.
This page last updated in Release Number: 13-02
Release Date: 11/14/13
Effective Date: 11/14/13
